OK so after breaking down the original NES and rewiring the buttons and scraping the money together for some of the parts, its time to move onto the next phase. Which is to start to fit the PC components into the NES. The main focus is the motherboard because without it you wont be able to do much and it takes the most space. Again my motherboard of choice was the
Zotac A-U Atom N330
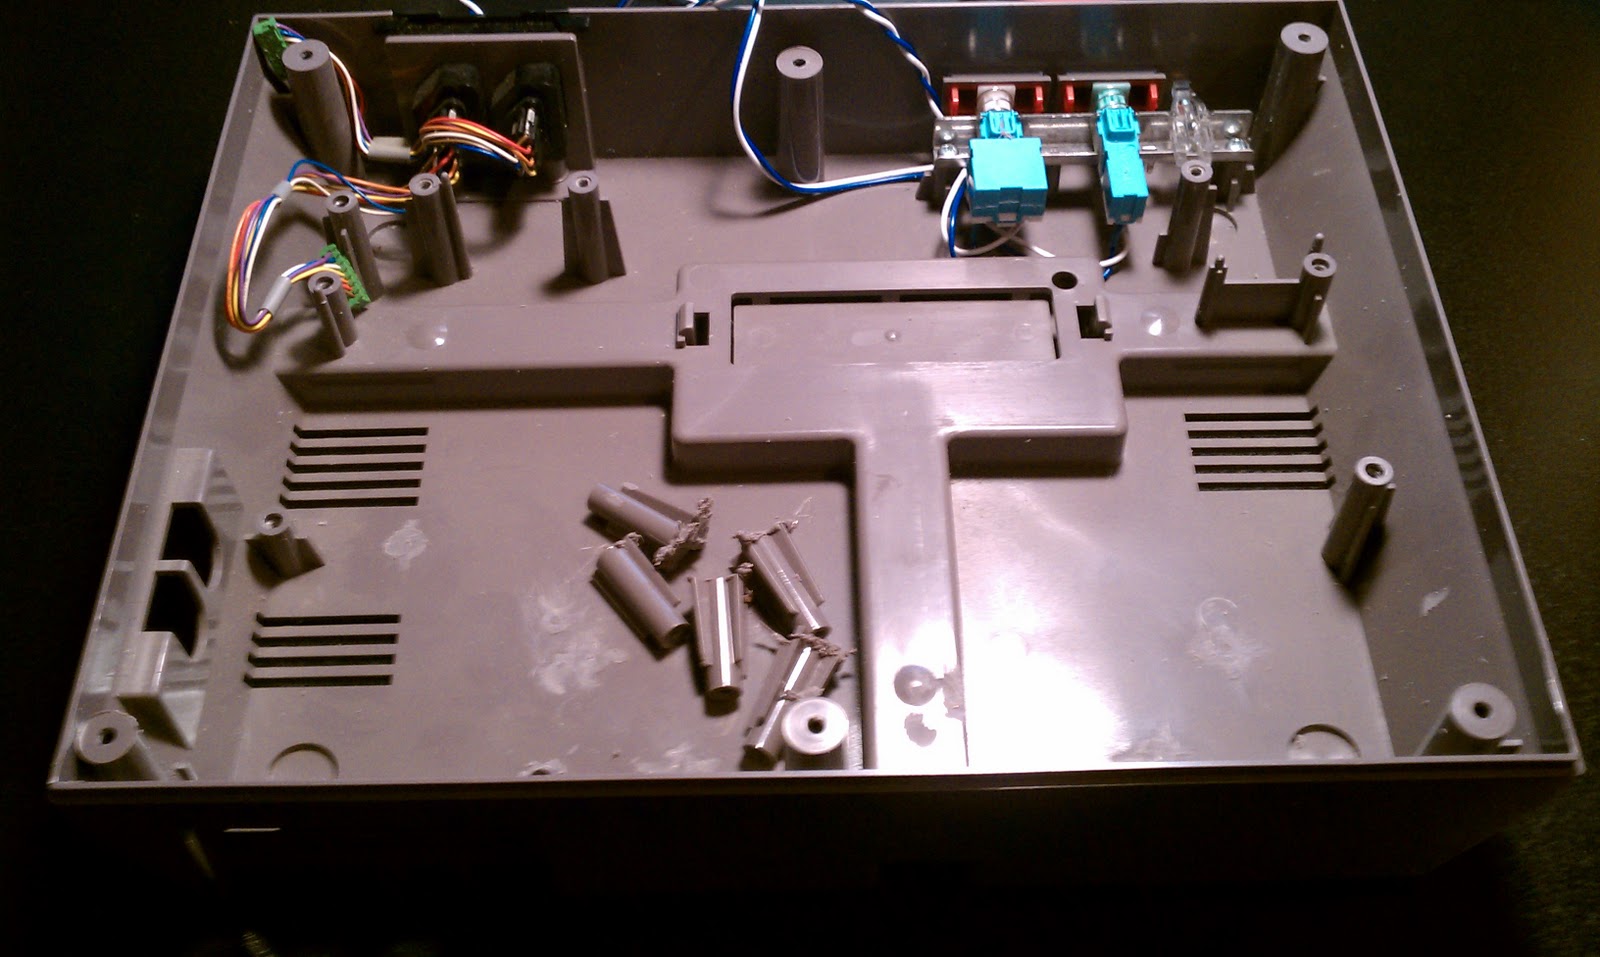
. After shaving out all of the pegs in the bottom of the NES I was then able to set the motherboard on the very bottom to get an idea of what clearance and space it was going take. Then after deciding to position all of the I/O ports facing out the back of the NES I set out to drilling the holes to custom fit each port on the back of the motherboard.
After getting a couple of the big I/O holes cut I fit the motherboard and recycling some of the pegs I cut out earlier I fit in 4 motherboard mounting posts. The posts in the NES were perfect. They are plastic, they have screw holes and screws and the screws are about the right size. This also means the motherboard will not be free floating and should not move around when you move the unit as a whole. To create and attach the posts I ground them down to height to match where I wanted the board then using hot glue I put them into place. You could sub the hot glue for another kind of strong adhesive as I know hot glue is not the best but I don't plan on dropping or jarring the unit so they should hold OK. Also of note the motherboard does sit on top of the buttons but is just resting no real pressure.
Cutting custom holes for the I/O connections is not the easiest task and does take a lot of time, precision and re-measuring and
Dremeling

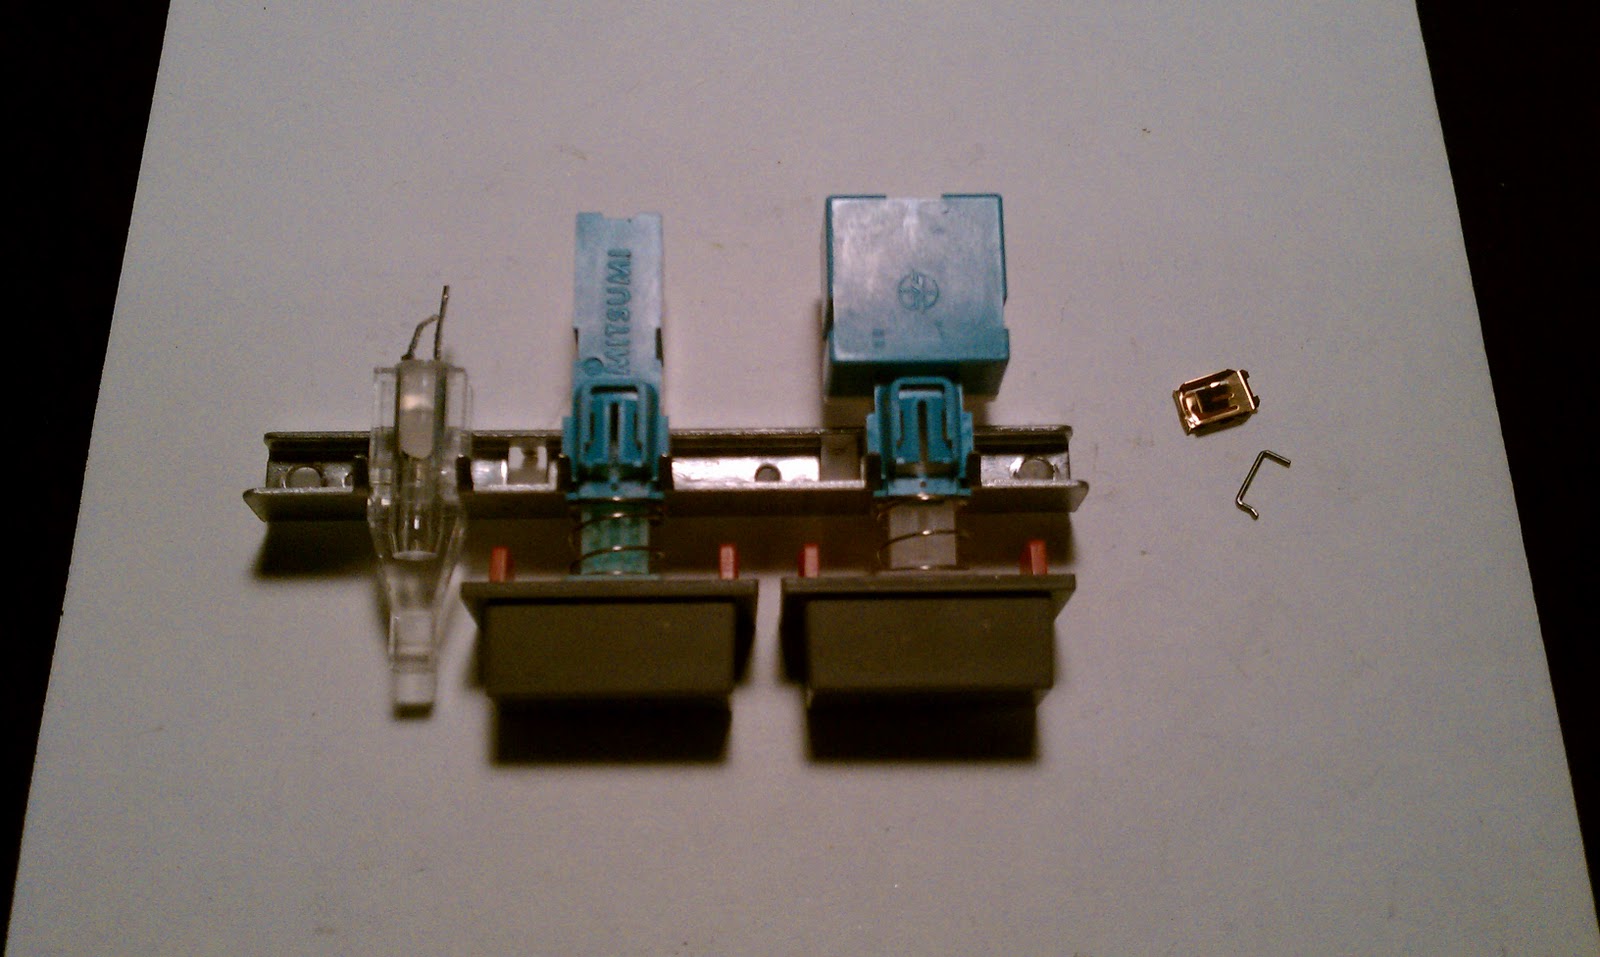
. Also a lot of it is done by "eyeballing" as it is difficult to measure because the included I/O shield while giving you a good idea has holes a lot bigger than I wanted. I wanted a tight fit to everything. But after a couple of hours of drilling and some filing I had the results I wanted....mostly. One hiccup was that the PS/2 port kind of fell behind the black cover and I had to shave it back just enough to fit the connection.
Once all of the I/O holes were cut and everything fit nicely and were tested with various cables. That is key because the holes to have to be slightly larger than the port because a cable has to connect. Then I screwed the motherboard into place and connected the power and reset button to the motherboard.
The next step was to rewire the original NES controller ports to USB connections.
RetroUSB sells chips that you can wire the ports to and it converts them to USB connections. By wiring the ports and not the controllers it allows me to use any original NES controller including the big joypad. I do believe though that the NES Zap Gun does not work. RetroUSB does have instructions on how to wire the chip. I did however have to convert the USB connection it came with so that it was an internal USB (connect direct to motherboard) and not an external USB. This way no USB ports are wasted and its all inside the case. If you do make the mistake I did and wire the ports up outside of the case you can cut a small slit to feed the wires through to get the ports back into their original place.


One of the last parts is connecting the other parts like the RAM and hard drive. Installing the ram is easy, mounting the hard drive proved to be more difficult. I think I came up with a creative solution. I bought a couple of tiny hinges from my local hardware store and using
J-B Weld
epoxy I attached the hinges to the roof of the NES and then screwed in the hard drive. Is tricky to remove if needed because you need a right angle screw driver but it was necessary because I wanted to leave enough space to mount a future blu-ray drive. Another reason for the roof mount was to allow placement of a fan to help with airflow.
After getting the hard drive mounted and testing that the machine would boot up I found that the unit could not run without a fan. The motherboard included one but there is no true way of mounting it to the CPU heat-sink. So I opted to use it to suck in air from corner port holes left over from original NES connections that are now gone. It now stays cool enough to run long stretches but I am still looking to find a way to boost the fans ability some how.
Here are a couple pictures of the "finished" unit. As well as it sitting side by side with a working NES. The only thing I am still waiting on is to acquire a slim style blu-ray drive. As of writing there are not a ton of them to choose from and in the mean time I am using a USB DVD drive for any DVD playback or use. Once I get a blu-ray drive I will post how I get it installed. The plan is to mount it in a way that it is accessible by opening the game cartridge door.
Can you tell which one is the real NES??
The one on the left in both pictures!
Next Post.....The Software

 It will take some time to tweak XBMC and the other programs you have to function the way that you want. There is a lot of good information out there for Ubuntu and XBMC. Once you get it working though you then can sit back and enjoy your hard work. One of the last things to think about is a wireless way to work a keyboard and mouse. (I do suggest a regular keyboard and mouse to do basic setup just for speed and ease of use) To do this there are various options you can use. You can use a full keyboard and